One of the stages of configuring the store is to set the shipping methods for the order. Depending on your business strategy, you can make available to your customers multiple delivery options for their purchased products. In this guide, we show how to quickly add delivery methods in Shopware 6 and how to configure them according to their operating conditions. Additionally, you will also find the described function of setting additional rules for charging shipping costs based on the price matrix.
How to set up shipping methods
There are two types of shipping set by default in Shopware: Express and Standard. In order to add new methods, go to the settings in the administration panel (AP), select “Shipping”, and then click the “Add shipping method” button.
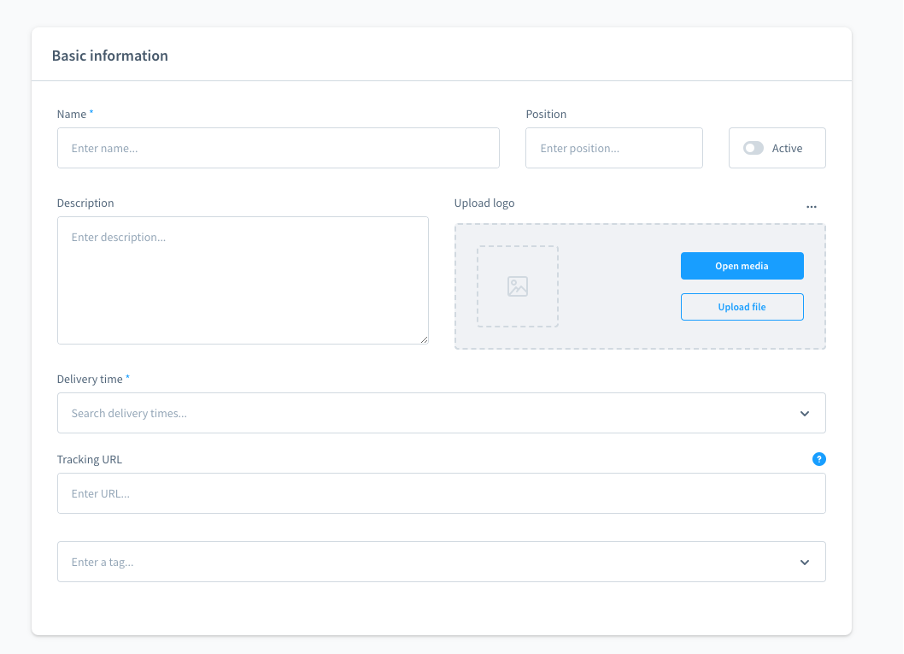
Having clicked the button, you will be redirected to the page with basic information that you need to complete. Description of each section is provided below.
Name: name of the shipping method. Remember that the name is also visible in the sales channel so choose it mindfully.
Position: this field allows you to set the order of displaying shipping methods during the checkout.
Active: this button activates and deactivates the selected method.
Description: in this field you can describe the method in more detail. Just as in the case of the “Name” field, this information is also visible in the sales channel.
Upload logo: this field allows you to add a logo related to the shipping method; you can upload it from your device or provide a link only.
Delivery time: select the delivery time from the drop-down list. To make it visible in the interface, activate this option by going to: Settings -> Shopping -> Cart.
Tracking URL: in this field, you can enter the package tracking number. Instead of the actual tracking number, you can enter the “%s” placeholder. Shopware will then automatically insert the correct code for each order based on the order details, provided they are kept.
Tags: in this field, you can select key words/phrases for a given shipping method from a drop-down list. If you can’t find a tag in the list, you can add a new one; just enter its name and confirm your choice by clicking “Add + tag name” option.
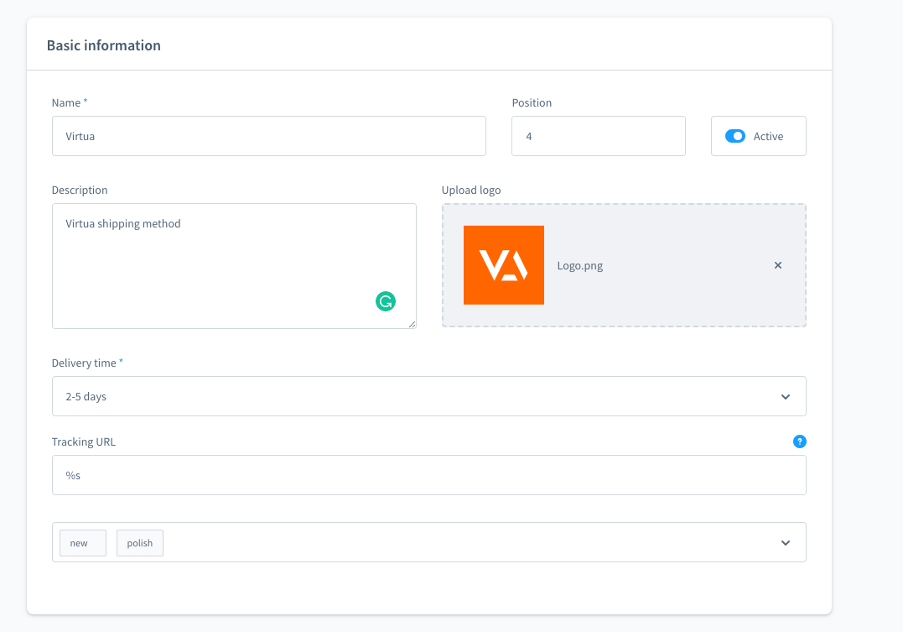
An example filled field with basic information looks like this:
Having completed the basic information, you can proceed to the next sections.
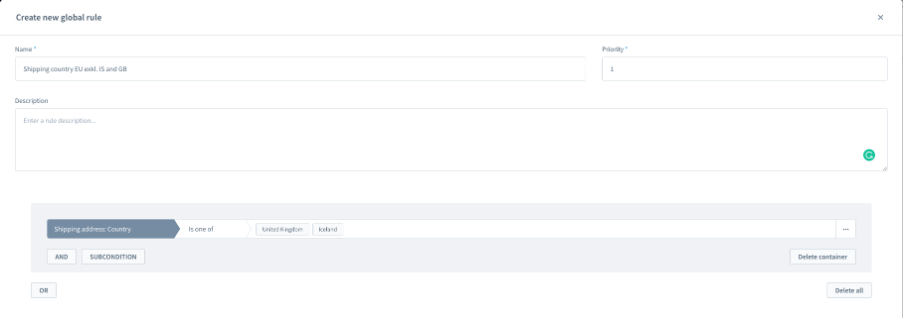
Availability: in this field, you can create a new availability rule or select one from the list. To create a new rule, use the Rule Builder. We described the process in more detail in our previous article. You should specify when you can ship the goods with this method, e.g. only for orders placed on Saturdays and Sundays, or – as in the example – the shipment is available to all European countries, excluding Iceland and the UK.
Tax calculation: select the applicable tax rate for this shipping method from the drop-down list. The process of how the rates are calculated is described in more detail in the Shopware documentation available on the official website of the platform.
How to configure the price matrix
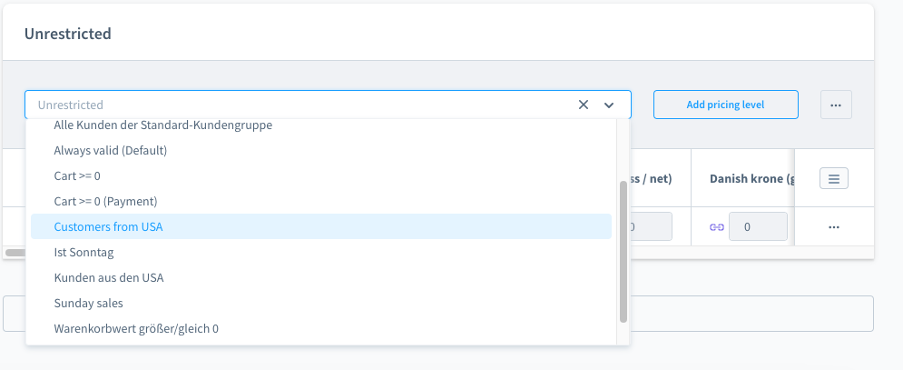
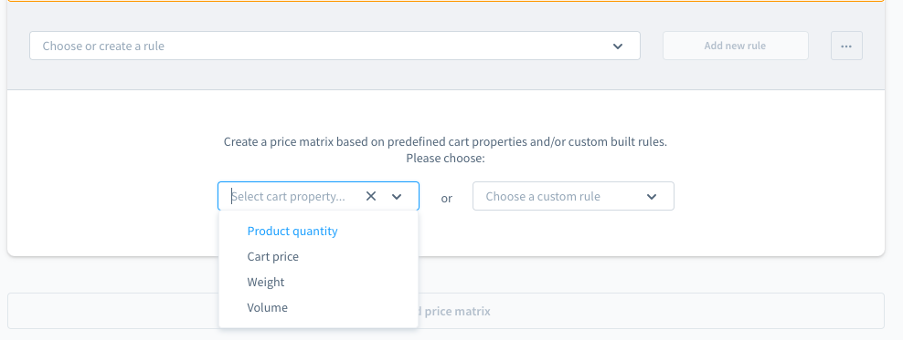
When you create a new price matrix, you can add various restrictions. Select one of the options from the drop-down list or add your own using the Rule Builder. This ensures that the matrix will only be used when certain conditions are met. If you don’t define any restrictions at this stage, the price matrix you are now creating will always be used for the shipping method you’re doing it for.
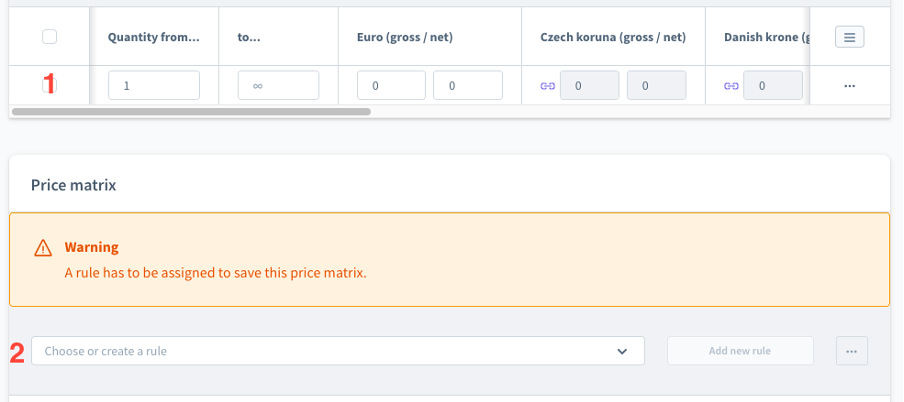
In the first step, choose whether you want the new price matrix to be based on predefined properties (see No. 1 in the graphic) or on rules from the Rule Builder (see No. 2 in the graphic). You can use both options.
If you choose option 1, complete the fields shown below, according to how the shipping should work. When you define the price in Euro, prices for other currencies will be automatically converted.
If you choose option 2, select or create a new rule in the Rule Builder. You can also skip this step and go straight to selecting the properties based on which you want to create a new price matrix.
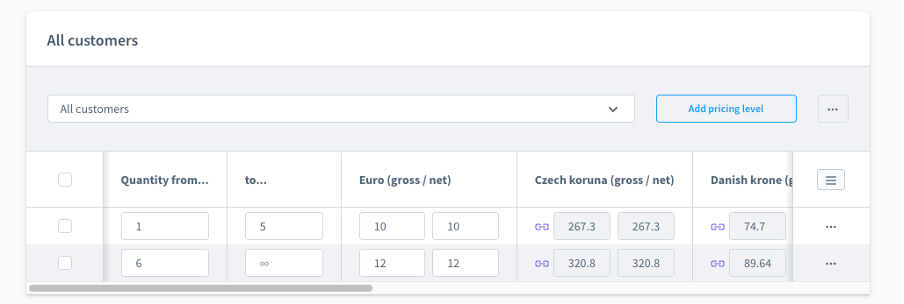
Example 1: The price matrix for the number of items in the cart.
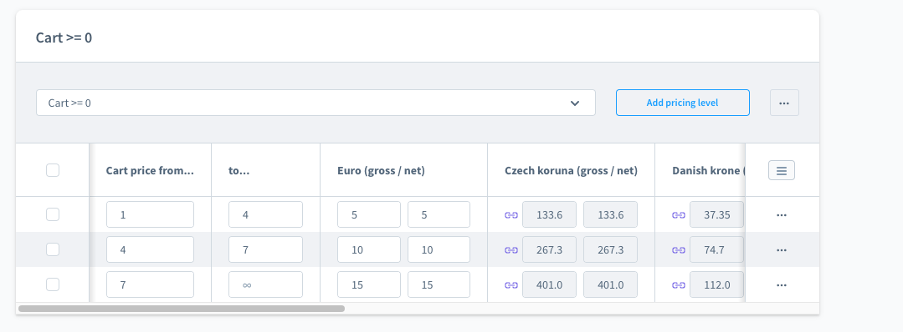
Example 2: The price matrix for the cart value.
Shopware allows you to fill the matrix with as many price rules as you need.
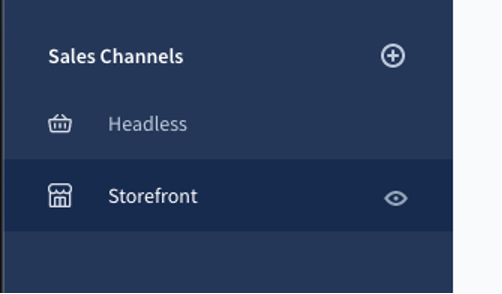
Now that you’ve created a new matrix, you only need to implement it in the sales channel. From the side menu, select the sales channel to which the method applies.
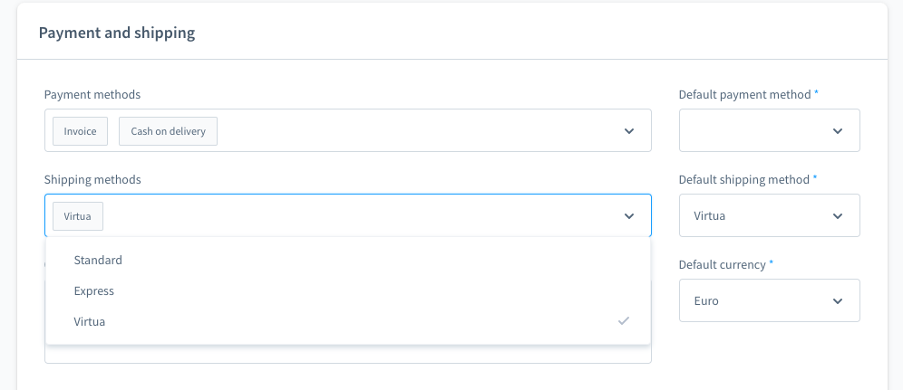
Scroll down to the “Payment and shipping” section and select the method you created from the drop-down list in the “Shipping methods” field. Remember to save your changes by clicking the “Save” button.
And you’re done!
We hope this guide helped you get seamlessly through the process of adding new shipping methods in Shopware 6. If you have any additional questions about setting delivery methods or configuring a store on the Shopware platform, feel free to contact us.


